Before we dive in, I should mention: this project is all my husband’s handiwork. When there’s sawdust flying and power tools buzzing, it’s usually his happy place. I told him I’d make sure you know who to thank (or blame) for this one—so settle in and enjoy his signature process, full of dry wit and a few woodworking surprises.
Watch as he transforms an unremarkable block of pine into a bold, shimmering centerpiece—using patience, fire, and a splash of magenta magic.
How the Magenta Mirage Tealight Holder Was Made
Ever look at a candle holder and think, “Someone must have had too much coffee, too much time, and a power tool or two lying around”? Good, because that’s exactly how this came to be. Here’s a step-by-step (and occasionally sideways) peek into the making of the Magenta Mirage tealight holder.
With the introduction done, let’s head to the very beginning—the humble, unassuming block that started it all.
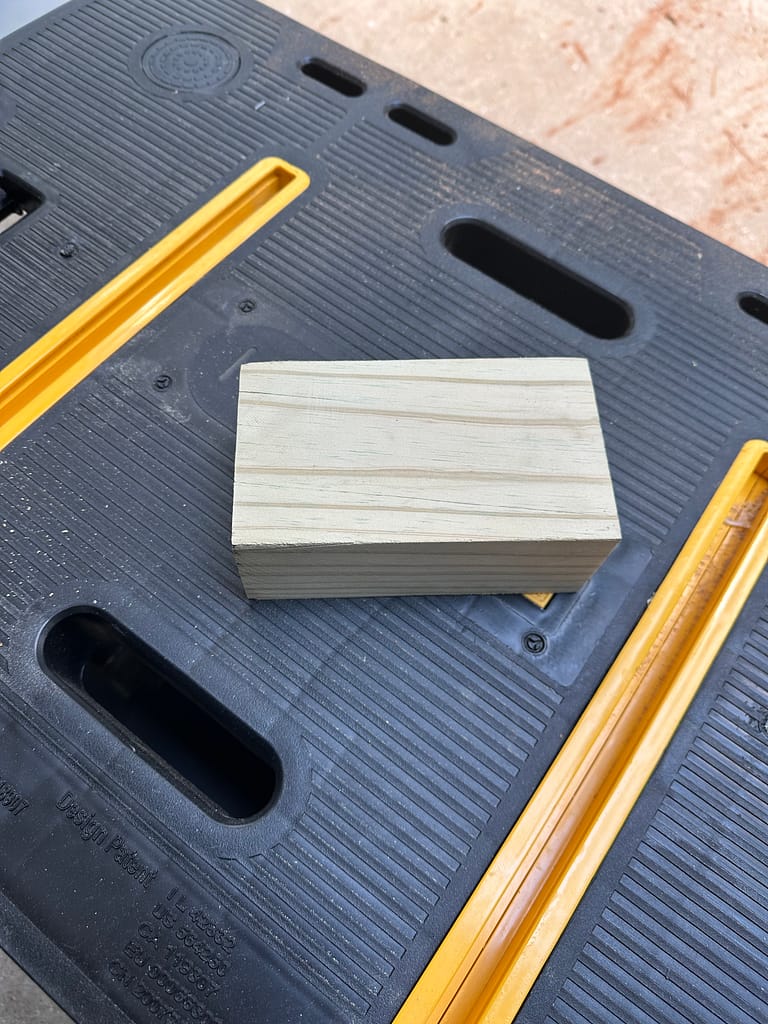
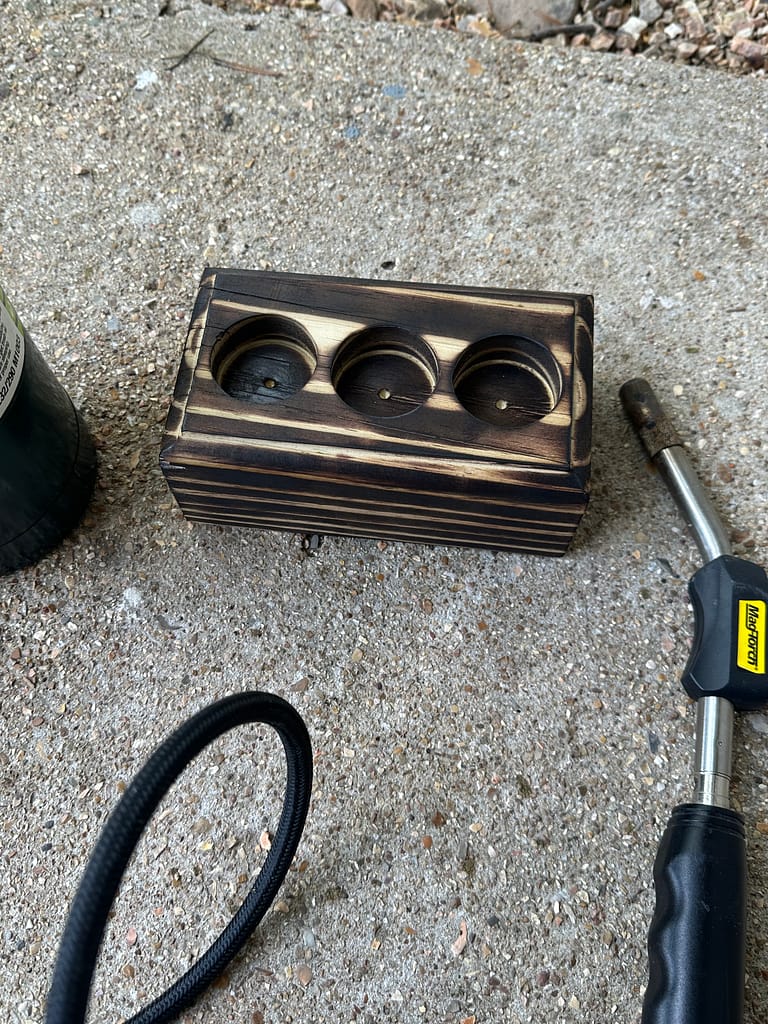
Step 1 – Blank Slate: The Block of Pine
Every masterpiece starts as a humble block. Not glamorous, but hey, everyone’s got to start somewhere.
Once the basic shape was set, it was time to put some care into those raw edges and make the piece more inviting.
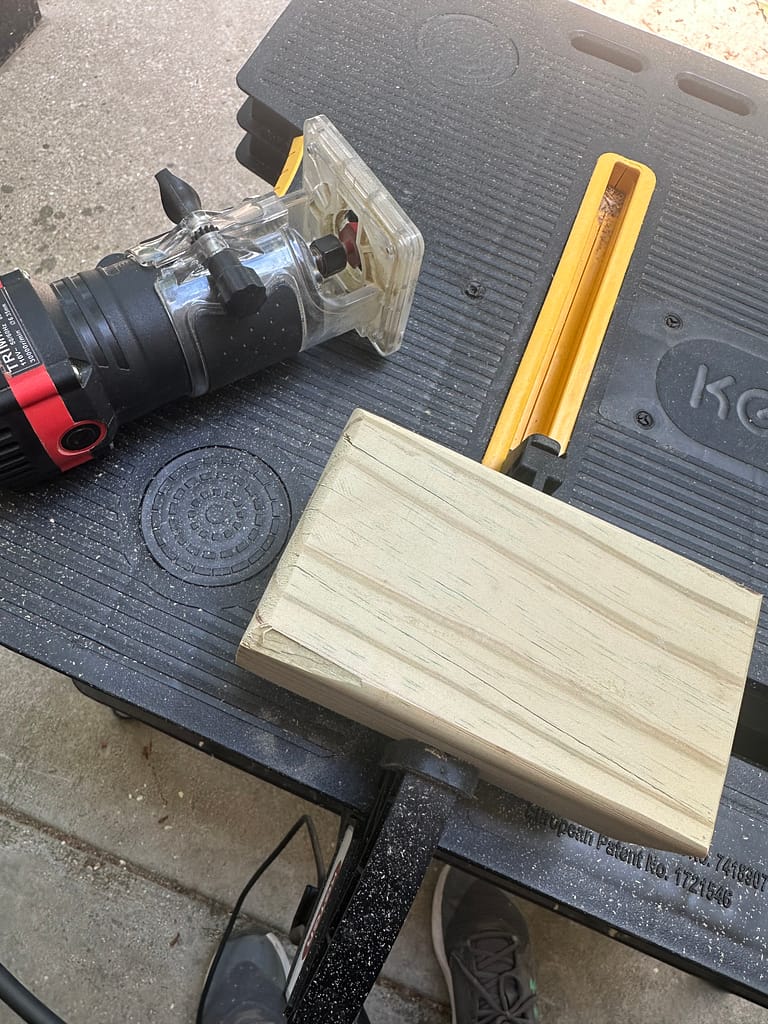
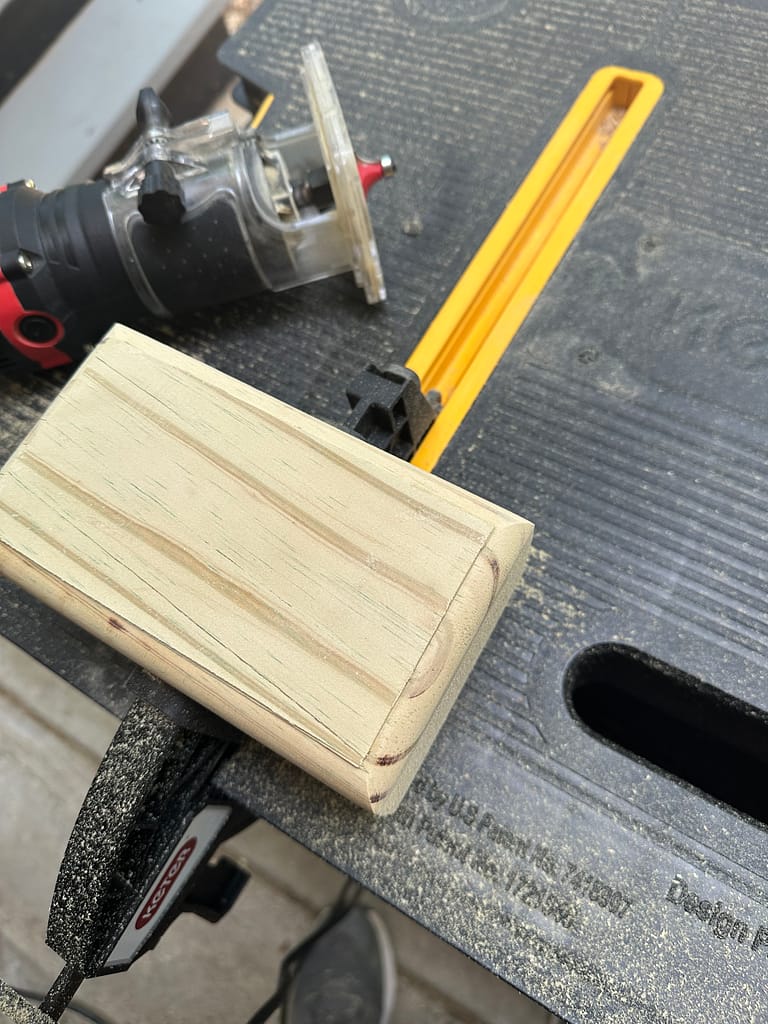
Step 2 – Edges that Don’t Bite
Time to sand and round off those sharp edges, so you can actually handle this thing without regretting it.
With smoother edges, the next milestone was giving this block a true purpose—transforming it from a plain chunk of wood into an actual candle holder.
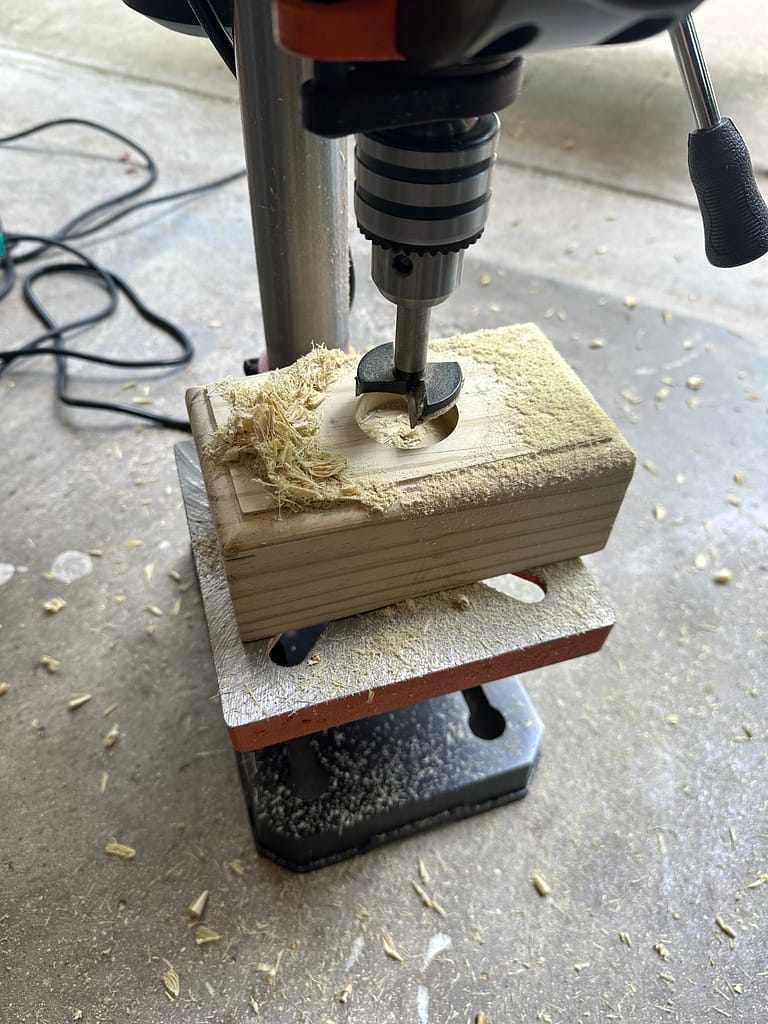
Step 3 – Precision Power Tools
Let’s make it a tealight holder and not just a weird wooden brick. Time for the drill press to earn its keep.
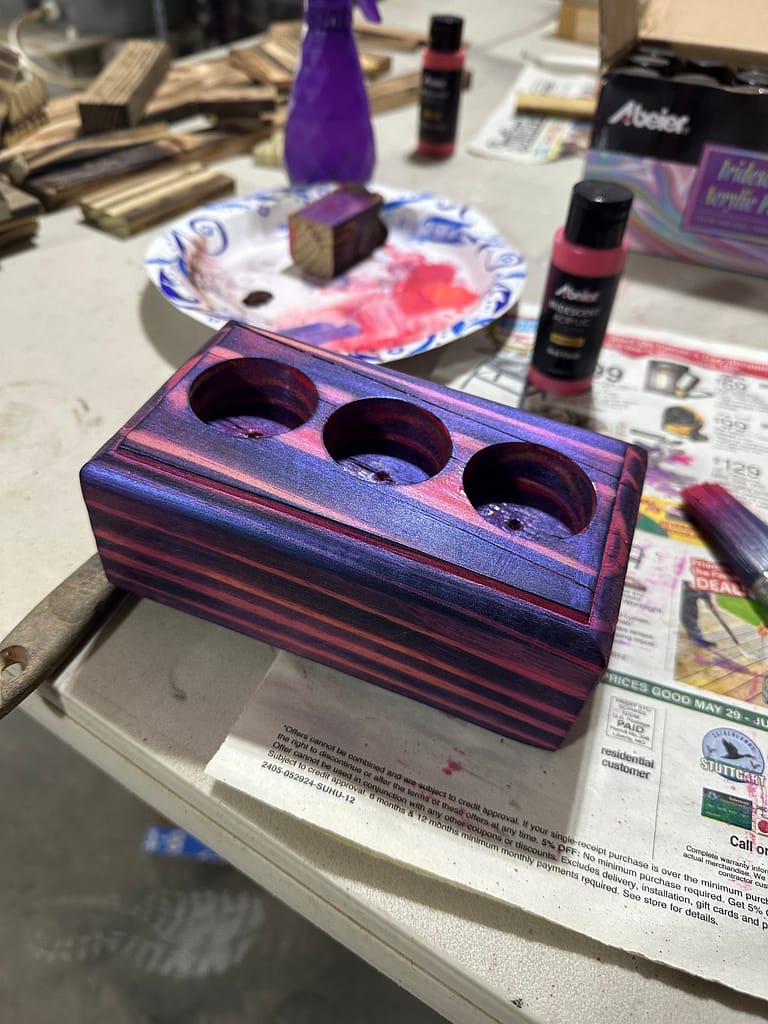
Ready for some fun? Here comes the fiery part—adding character and bold contrast with traditional shou sugi ban.
Step 4 – Shou Sugi Ban: Setting Things on Fire (Artfully)
Who says you can’t play with fire? This charring process gives the wood a dramatic grain and vibe—plus, it smells like achievement (and possibly a campfire).
Charred and dramatic, the piece was now set for color. Let’s bring it to life with vivid iridescent paints.
Step 5 – Painting on that Mirage Magic
Bring on the the red flash iridescent paint. More layers, more shimmer, more “wow, that’s loud.” (This is the part where it stops looking edible.)
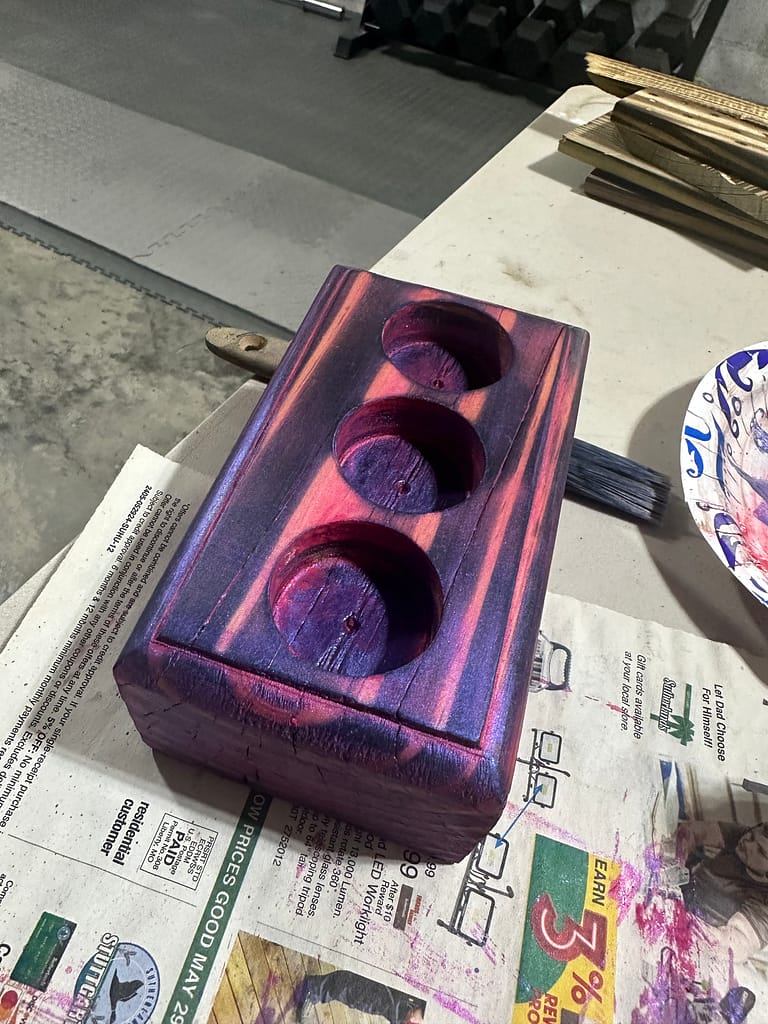
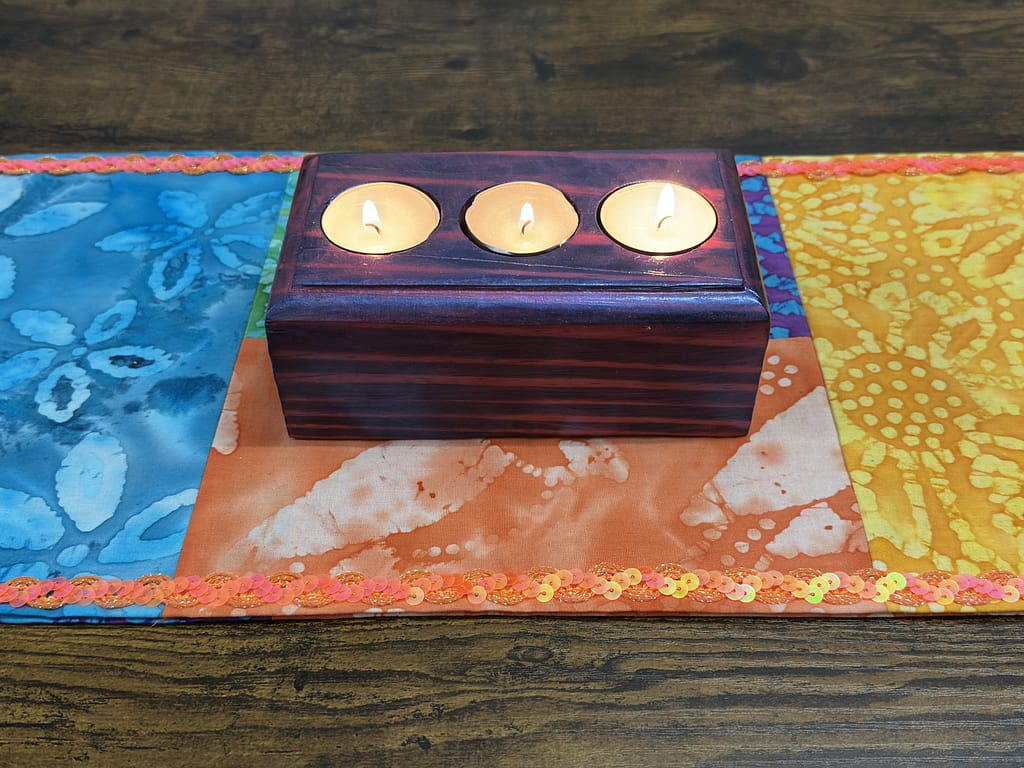
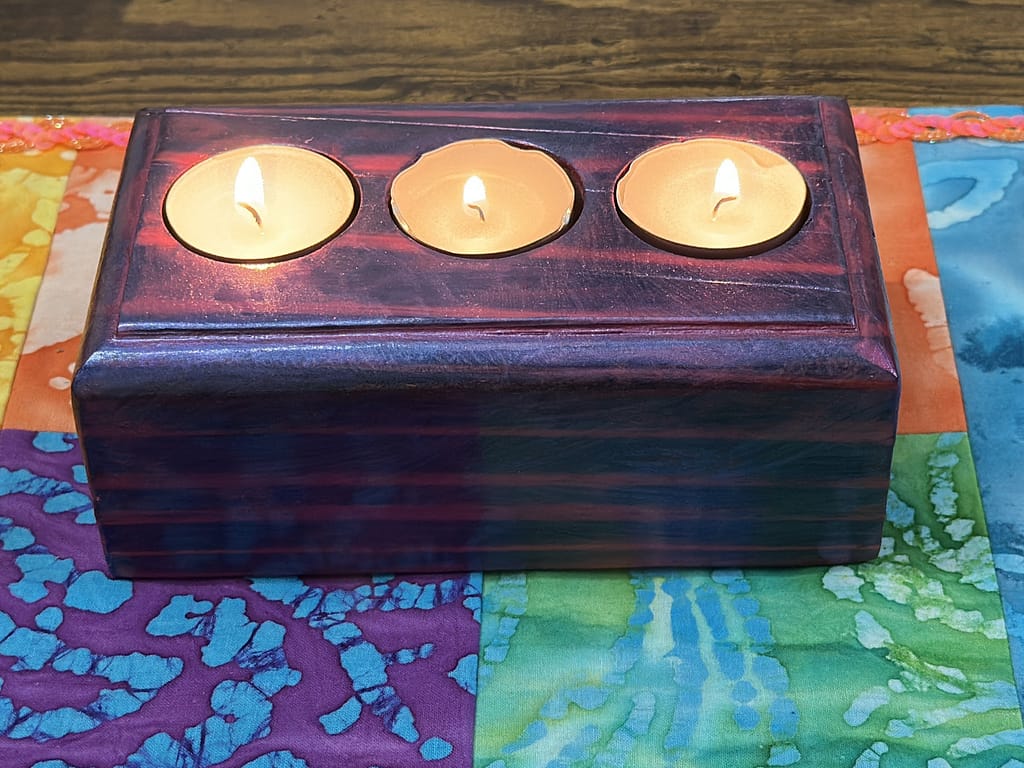
With the finishing touches dry, all that’s left is to show off the final result—time for the big reveal!
The Big Reveal
Ready to light some tealights—and maybe some dinner table conversations—here’s the final look.
A Maker’s Philosophy
Around here, half the fun is taking something old (or basic), making it look new, and then giving it just enough character to make you question whether it’s vintage or something you could still smell the paint on. If you can’t decide, we call that a win.
Want to take a bit of the Magenta Mirage home?
Check out the latest in the shop, or drop your wood-burning questions in the comments—power tools not required.
Have you tried something similar? Drop your project stories below— we would love to see them!